Import Custom Assets with an Unreal Pak
This guide explains how to package custom Unreal Engine assets into a standard
.pak file and make them available to a packaged binary. The workflow uses
Unreal Engine’s normal PAK and Asset Manager features and follows the general
approach described by SimWorld.
Quick Start
Place custom assets in a UE project, for example
YourProject/Content/MyAssets/.Create a PAK file from those assets.
Copy the PAK into the packaged application’s
Content/Paks/directory.Start the packaged binary. Applications that support runtime PAK discovery can mount and scan the assets during startup.
Prerequisites
Unreal Engine 5.6 or a compatible engine version.
A packaged binary whose runtime supports loading external PAK files.
Basic familiarity with Unreal Engine asset creation and packaging.
Step 1. Create a PAK File
Use Unreal Engine’s standard PAK loading workflow. See the official Epic tutorial. The general process is:
Create a normal Unreal Engine project.
Import your custom assets.
Cook the assets.
Package them into a
.pakfile.
Users only need to package their assets into a PAK file and place it in the packaged binary’s PAK directory. The runtime-specific mount and scan behavior depends on the application.
1. Organize Assets
Place all assets that should be exported into a PAK under a dedicated folder.
Example:
Content/
└── MyAssets/
    ├── Meshes/
    ├── Materials/
    ├── Textures/
    └── Characters/
2. Create a Primary Asset Label
In the Content Browser, create a Primary Asset Label:
Right Click
 └── Miscellaneous
      └── Data Asset
           └── PrimaryAssetLabel
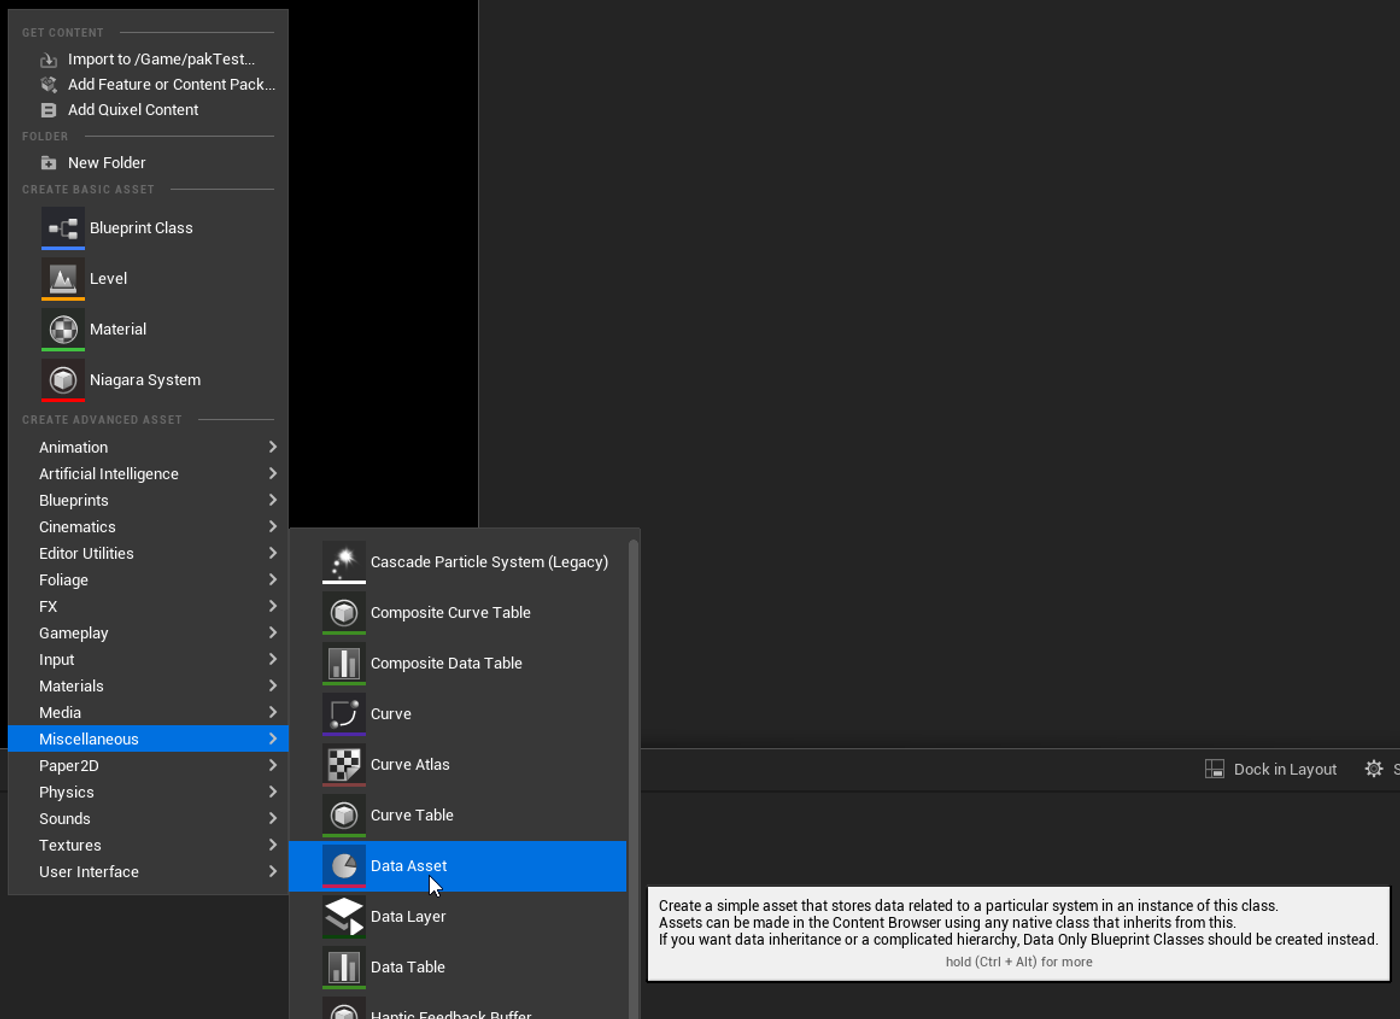
Create a new asset:
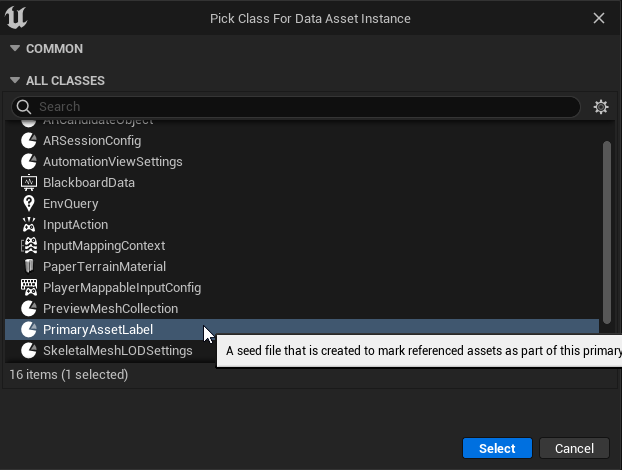
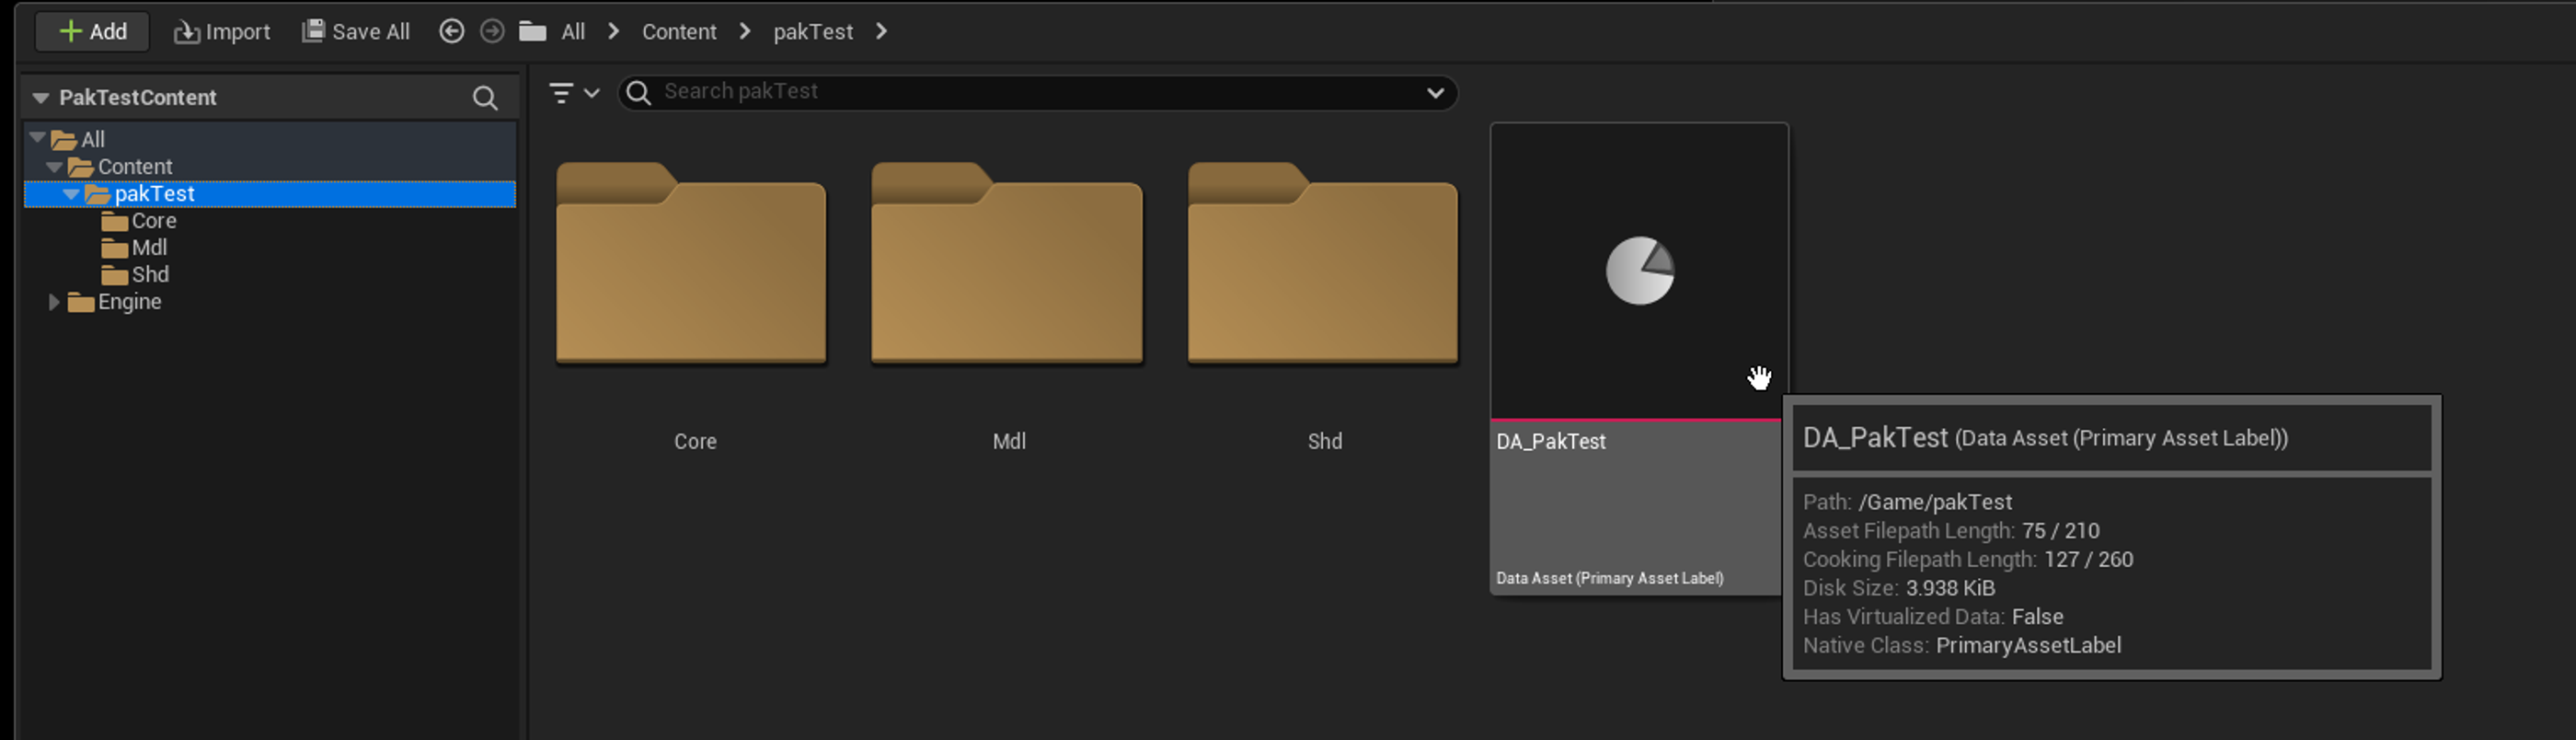
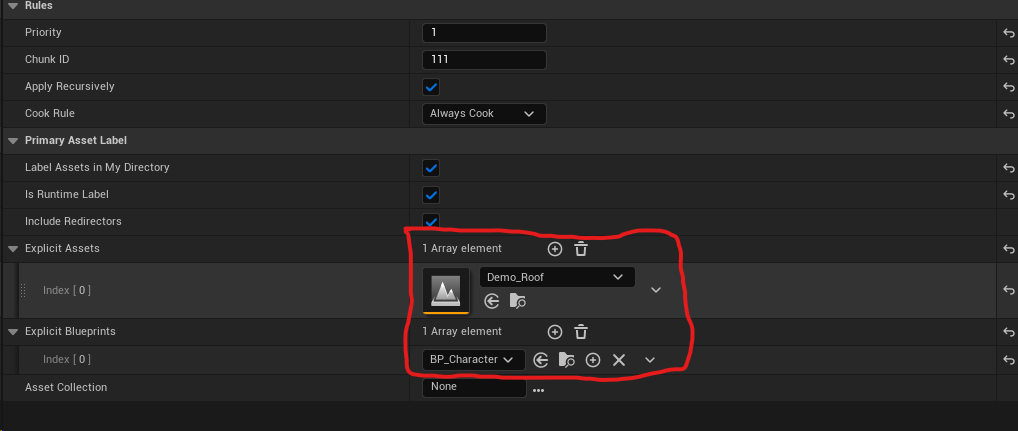
Configure the asset:
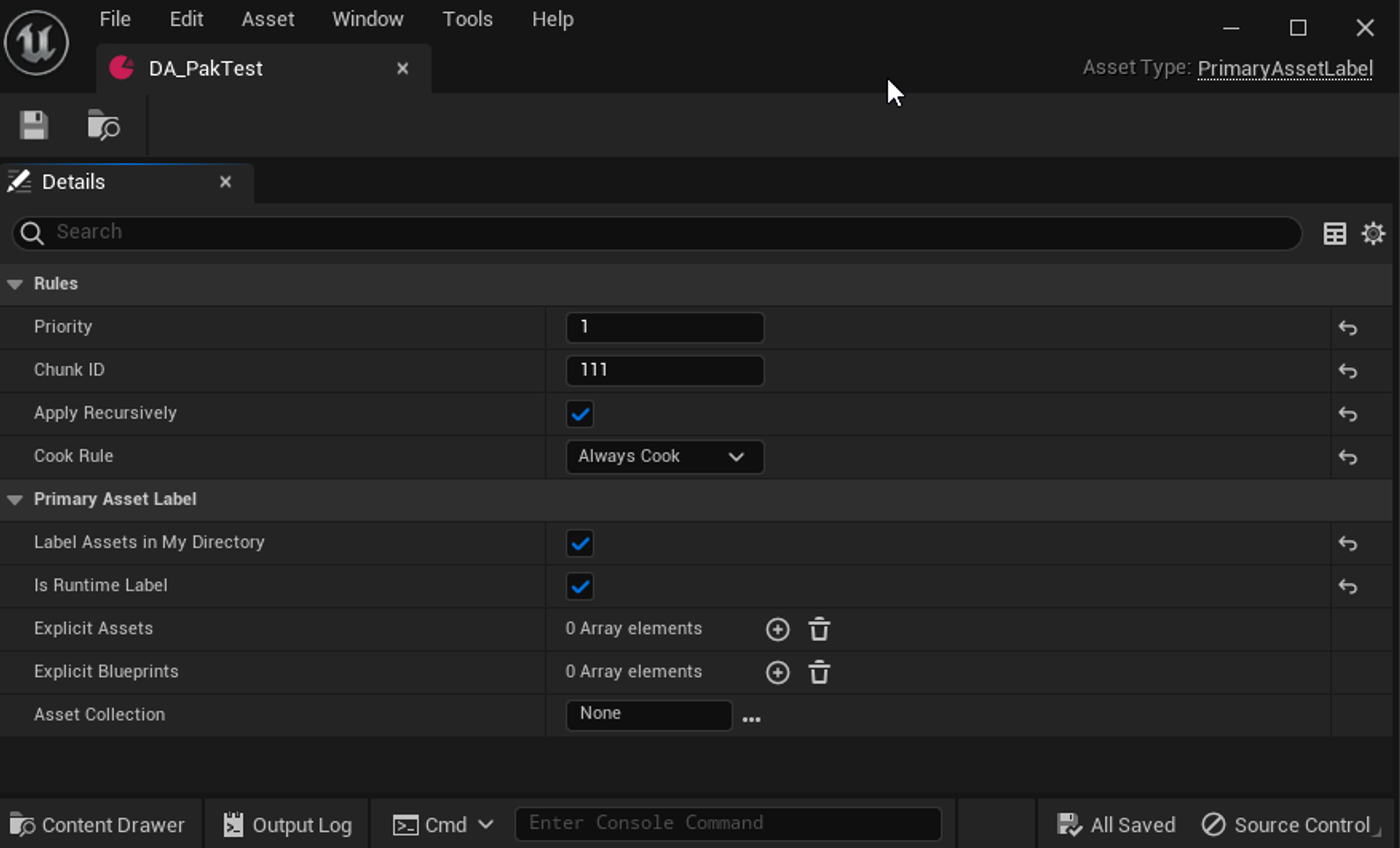
Choose a unique positive ChunkId greater than zero for each PAK. Chunk IDs
must be distinct; ID 0 is reserved.
Add all assets intended for packaging to the Data Asset’s Explicit Asset
and Explicit Blueprint fields. Conventional UAsset resources such as levels
and meshes go into Explicit Asset. Character blueprints and similar assets
go into Explicit Blueprint.
3. Configure Packaging
Open:
Edit
 └── Project Settings
      └── Packaging
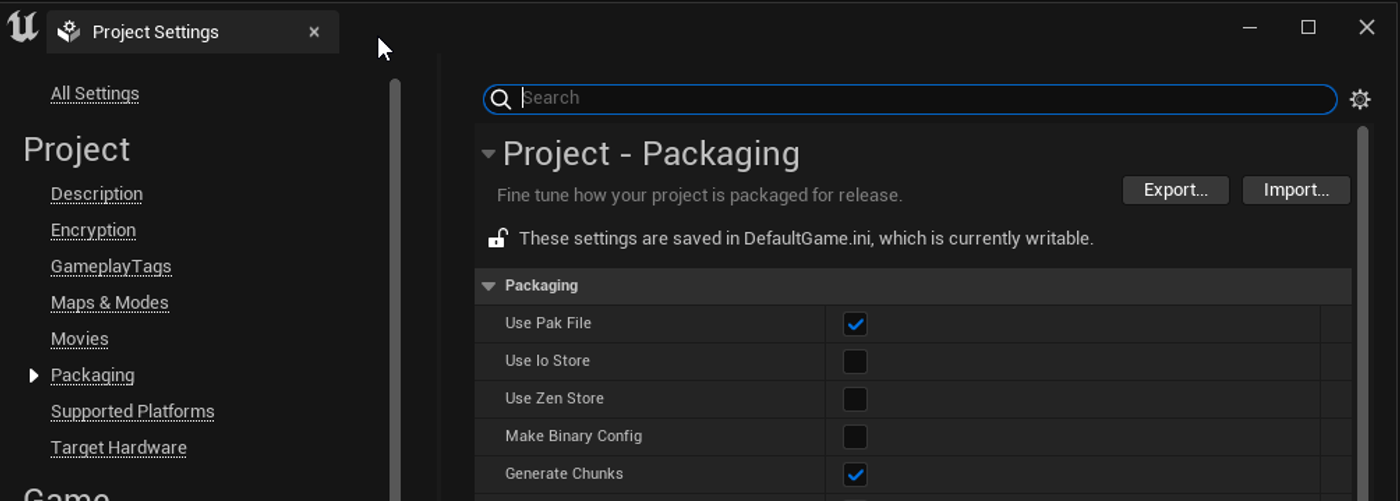
In the Packaging panel, enable:
Use Pak FileGenerate Chunks
Disable:
Use Io Store
If Use Io Store is enabled, disable it for this PAK workflow.
4. Configure Asset Manager
Open:
Edit
 └── Project Settings
      └── Asset Manager
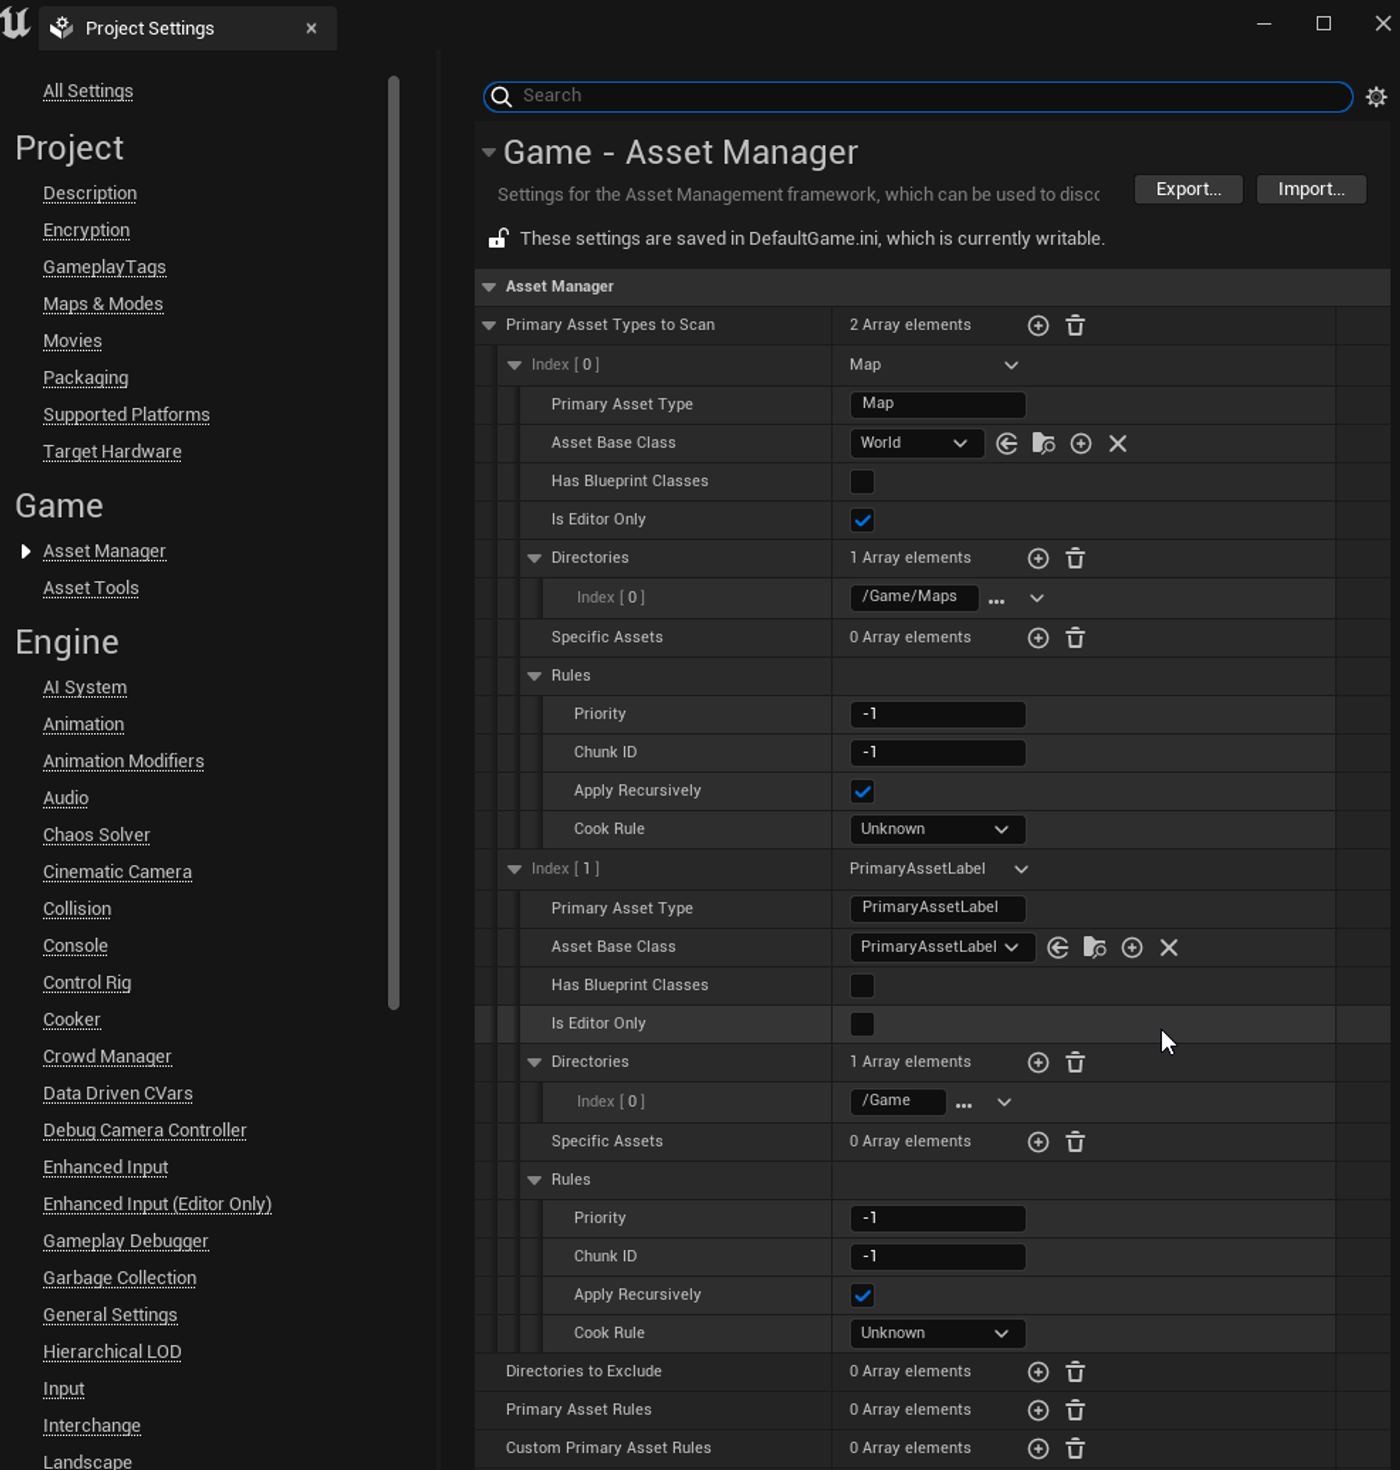
In the Asset Manager panel, disable PrimaryAssetLabel - Is Editor Only.
5. Package the Project
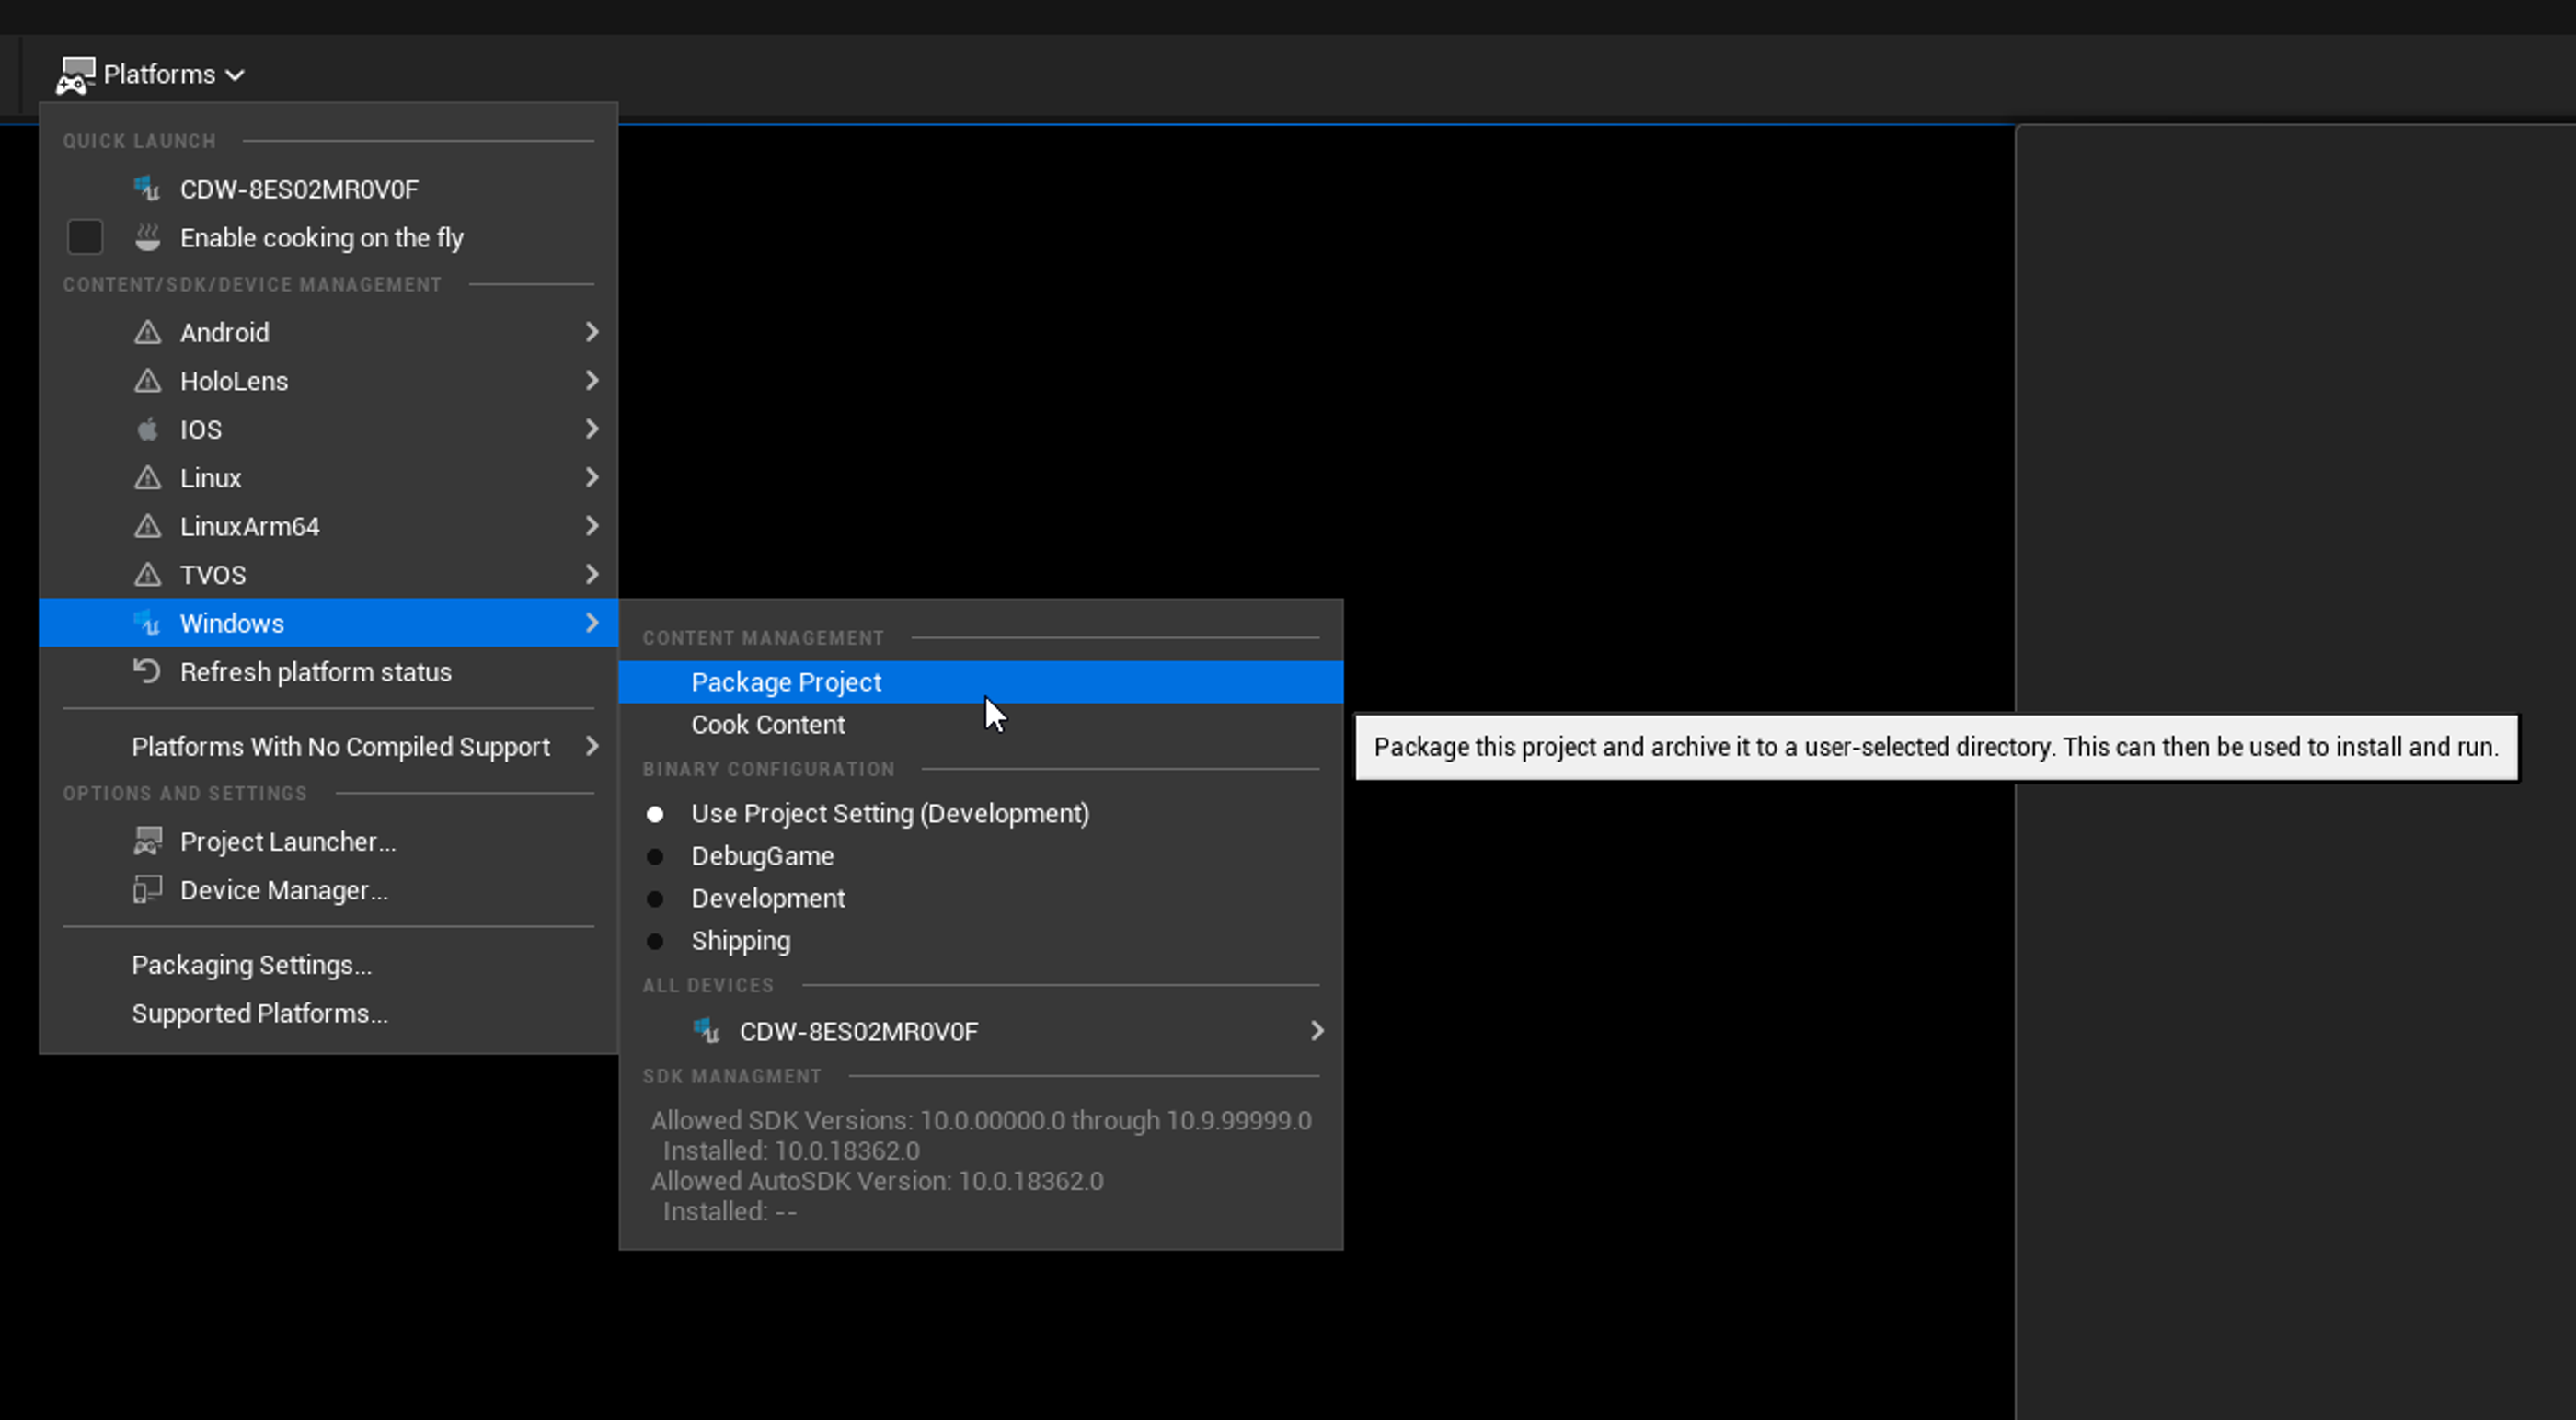
Package the project using the normal workflow:
Platforms
 └── Windows
      └── Package Project
Choose an output directory:
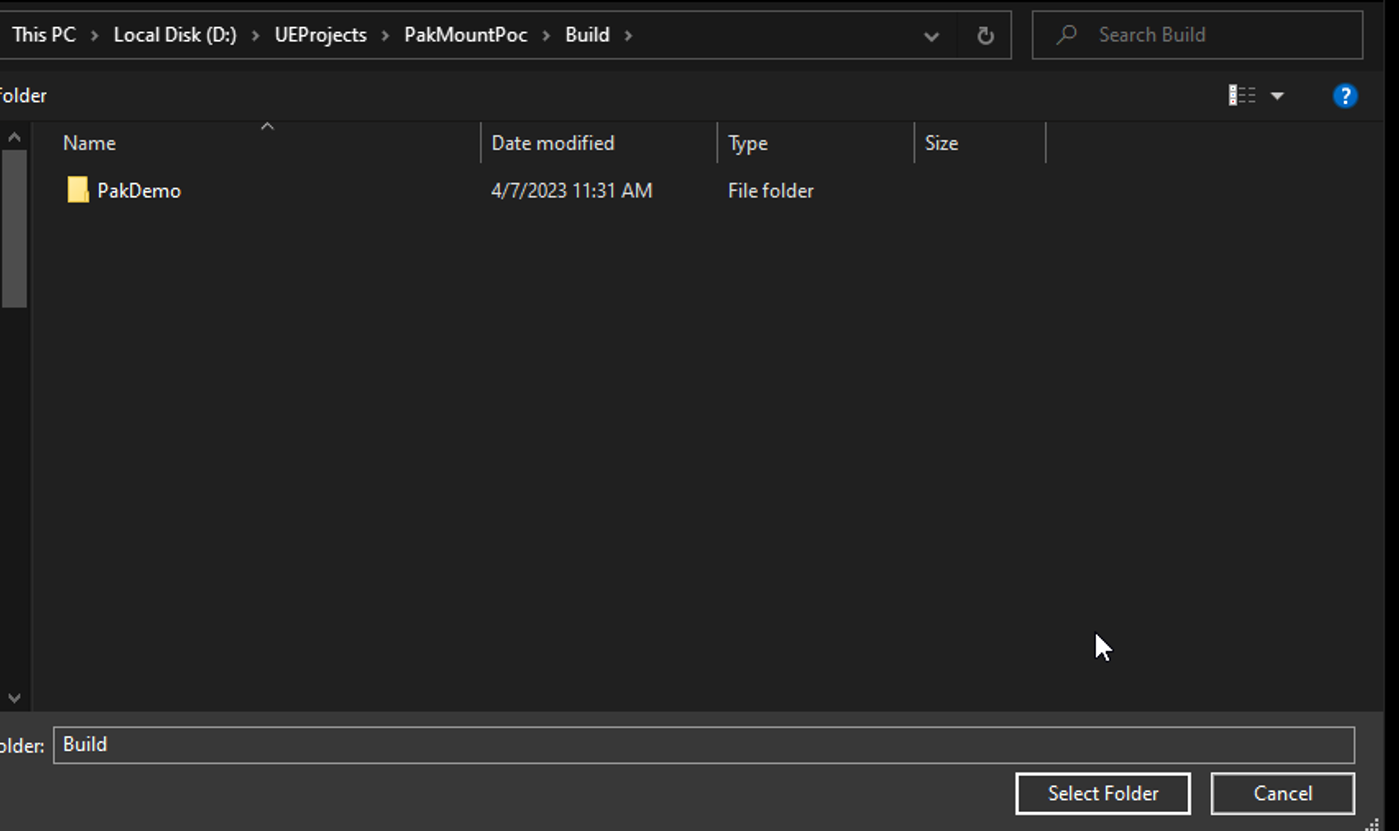
Wait for packaging to complete. Unreal Editor will report completion:
6. Locate the Generated PAK
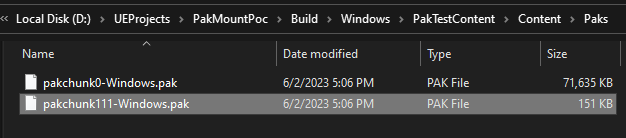
After packaging, locate the generated PAK under:
OutputPath/
└── Windows/
    └── YourProject/
        └── Content/
            └── Paks/
Example output:
Step 2. Import into a Packaged Binary
Copy the generated .pak file into the packaged binary’s PAK directory:
PackagedBinary/
└── Windows/
    └── YourApplication/
        └── Content/
            └── Paks/
                └── pakchunk111-Windows.pak
Multiple PAK files can be placed in this directory simultaneously.
Start the packaged binary normally. If its runtime implements automatic PAK
discovery, it will search Content/Paks/, mount discovered PAK files, and
scan their assets during startup.
UnrealZoo Optional API
Note
The following TCP commands and C++ helpers are optional UnrealZoo extensions. They are not required by the standard Unreal PAK workflow and are not included in the open-source UnrealCV build.
Mount a Pak
vset /pak/mount D:/Paks/Assets_Win64.pak 0
Mounted: D:/Paks/Assets_Win64.pak (Order: 0)
Optional C++ helper:
const bool bMounted = UPakMountBPLib::MountPakFile(
    TEXT("D:/Paks/Assets_Win64.pak"), 0);
Inspect, Scan, and Load
vget /pak/mounted
vget /pak/files 1
vget /pak/assets_in_pak 1
vset /pak/scan /Game/Assets 1
vget /pak/assets /Game/Assets
vget /pak/load /Game/Assets/BP_Chair.BP_Chair
Optional C++ helpers include ScanMountedAssets, GetAllAssetsInPath, and
LoadAssetFromPak.
Unmount a Pak
vset /pak/unmount 1
See Also
Pak File Management System for the UnrealZoo optional command reference.